A shiny bathtub makes your bathroom look clean and new. But over time, bathtubs lose their beauty. Scratches, stains, and discoloration make them look old. Many people think of buying a new tub, but that costs a lot. A better option is bathtub refinishing.
In this article, you will learn how to refinish a bathtub step by step. We will also cover tools, costs, tips, and FAQs to make the process clear and easy. If you want to do it yourself or hire a professional, this guide will help you make the right choice.
Understanding Bathtub Refinishing: Is It Right for You?
Bathtub refinishing is the process of applying a two-part epoxy or urethane enamel coating directly onto a prepared tub surface. This new finish bonds to the old one, creating a smooth, glossy, and non-porous layer that looks and feels like a brand-new tub. This process is highly effective for porcelain, fiberglass, acrylic, and cast iron bathtubs.
What Does Bathtub Refinishing Mean?
Bathtub refinishing, also called reglazing, is the process of giving your old tub a new surface. The old layer is cleaned, sanded, repaired, and then covered with a strong coating. The coating makes the bathtub look glossy and new.
Instead of removing and replacing the tub, refinishing saves time and money. It works for porcelain, fiberglass, and acrylic bathtubs.
When Should You Refinish Your Bathtub?
Not every bathtub needs to be replaced when it looks old. Sometimes, refinishing is the smarter choice. Here are the main situations when you should consider refinishing your bathtub:
Surface stains and discoloration
If your bathtub has stains that do not come off with cleaning, refinishing can cover them and restore a fresh, clean look.
Scratches and minor chips
Small cracks, scratches, or chips on the surface are common signs of wear. Refinishing fills and smooths these imperfections.
Faded or dull finish
Over time, bathtubs lose their shine. Refinishing gives the tub a glossy and new appearance again.
Color change needs
If your bathtub’s color looks outdated, refinishing allows you to change it to white, almond, or another modern color without replacing the whole tub.
You want a budget-friendly solution
Replacing a bathtub is costly and requires plumbing work. Refinishing is a faster and cheaper way to get the same refreshed result.
Your bathtub is still structurally strong
If your tub does not leak or have deep cracks, refinishing is the best option. It extends the life of your bathtub without the high cost of replacement.
Tools and Materials You Need
Before you start refinishing, gather all tools and materials. Having everything ready makes the process smooth.
| Tools & Materials | Purpose |
| Sandpaper / sanding block | Smooths the tub surface |
| Cleaner (non-abrasive) | Removes dirt and soap scum |
| Scraper or knife | Removes old caulk |
| Painter’s tape | Protects tiles and walls |
| Drop cloths | Protects bathroom floor |
| Protective mask and gloves | Keeps you safe from fumes |
| Refinishing kit | Main product for reglazing |
| Paintbrush or spray gun | Applies primer and coating |
| Caulk and caulking gun | Seals the edges after finishing |
Step-by-Step Guide: How to Refinish a Bathtub

Refinishing a bathtub may sound challenging, but when broken down into simple steps, it is a process almost anyone can handle. With the right preparation, tools, and patience, you can transform a dull and stained bathtub into a glossy, fresh-looking fixture.
Step 1: Clean the Bathtub Thoroughly
The very first step in refinishing is deep cleaning. Use a strong cleaner to scrub away all dirt, grease, and soap scum. Pay special attention to corners and edges, as these areas often collect hidden residue. Once the bathtub is scrubbed clean, rinse it with warm water and let it dry completely. This step is important because a clean surface allows the new finish to bond properly.
Step 2: Remove Old Caulk
After cleaning, check the edges of the bathtub for old caulk. Use a scraper or utility knife to carefully remove it. Make sure that no residue is left behind. Refinishing over caulk can cause peeling and uneven coating, which reduces the durability of the finish. Removing the caulk ensures that the coating spreads evenly across the surface.
Step 3: Sand the Tub Surface
Sanding prepares the bathtub surface for the new finish. Use fine-grit sandpaper to remove the glossy top layer. Work across the entire surface until the tub feels rough rather than smooth. This rough texture allows the primer and coating to adhere strongly. Once sanding is complete, rinse away any dust and allow the tub to dry fully before moving on.
Step 4: Repair Chips and Cracks
Before applying primer, repair any chips, small cracks, or surface damage. Most refinishing kits include a repair filler or putty designed for this purpose. Apply the filler carefully to the damaged spots and smooth it out so it blends with the tub surface. Allow it to dry completely before continuing. Proper repairs ensure that the finished bathtub looks even and polished.
Step 5: Protect the Surrounding Area
Since refinishing involves chemicals and coatings, it is important to protect the bathroom area. Cover tiles, walls, and fixtures with painter’s tape. Place a drop cloth on the bathroom floor to catch any drips or spills. Taking this extra step helps achieve a professional-looking result and prevents damage to your bathroom.
Step 6: Apply the Primer
Once the tub is prepped, the next step is applying a primer. The primer provides a base that allows the final coating to stick properly. Use a spray gun or brush to apply a thin and even layer. Make sure the entire surface is covered, then allow the primer to dry completely. Skipping this step can cause the topcoat to peel or chip over time.
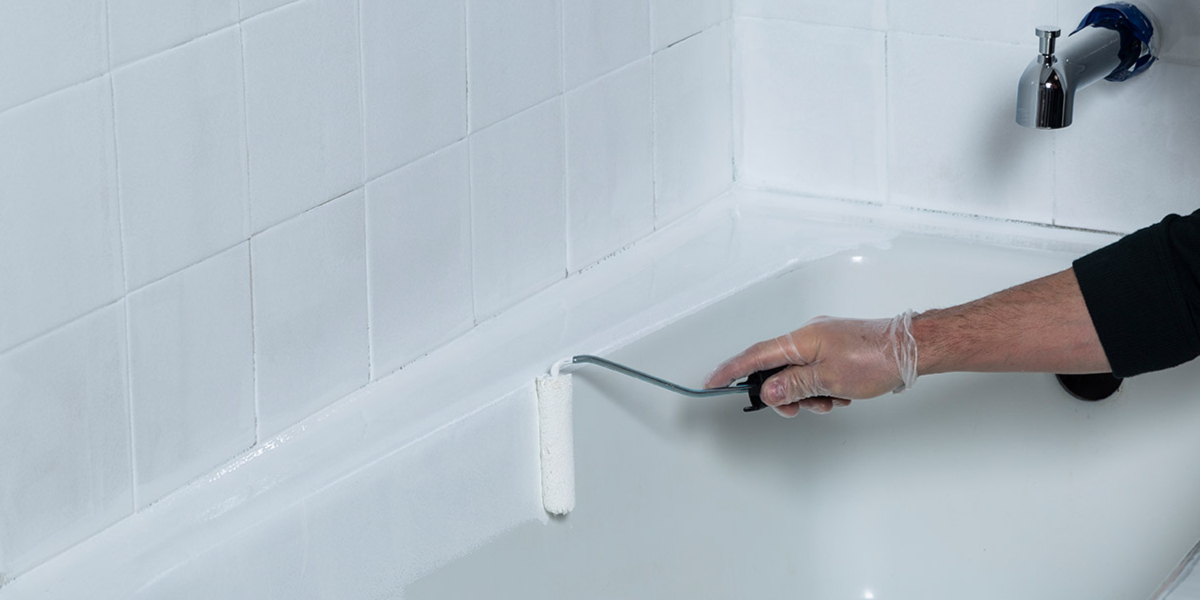
Step 7: Apply the Refinishing Coat
The refinishing coat is the main step that restores the bathtub’s shine. Shake the refinishing product well before use. Apply it in two or three thin layers rather than one thick coat. Thin layers dry more evenly and create a smoother, glossy surface. Between each coat, allow thirty to sixty minutes of drying time, depending on the product instructions. Once all coats are applied, the tub will already start to look like new.
Step 8: Allow the Tub to Cure
Curing is the process of letting the refinishing coat harden fully. Do not use or touch the bathtub for at least twenty-four to forty-eight hours. Keeping the bathroom well-ventilated during this time helps the curing process and reduces strong odors. Rushing this step can cause the surface to smudge or peel, so patience is important.
Step 9: Re-Caulk the Bathtub
When the refinishing coat is fully dry, apply fresh caulk around the bathtub edges. This seals the corners and prevents water from seeping into the walls or floor. A smooth line of caulk also improves the overall appearance of the refinished bathtub, giving it a neat and professional finish.
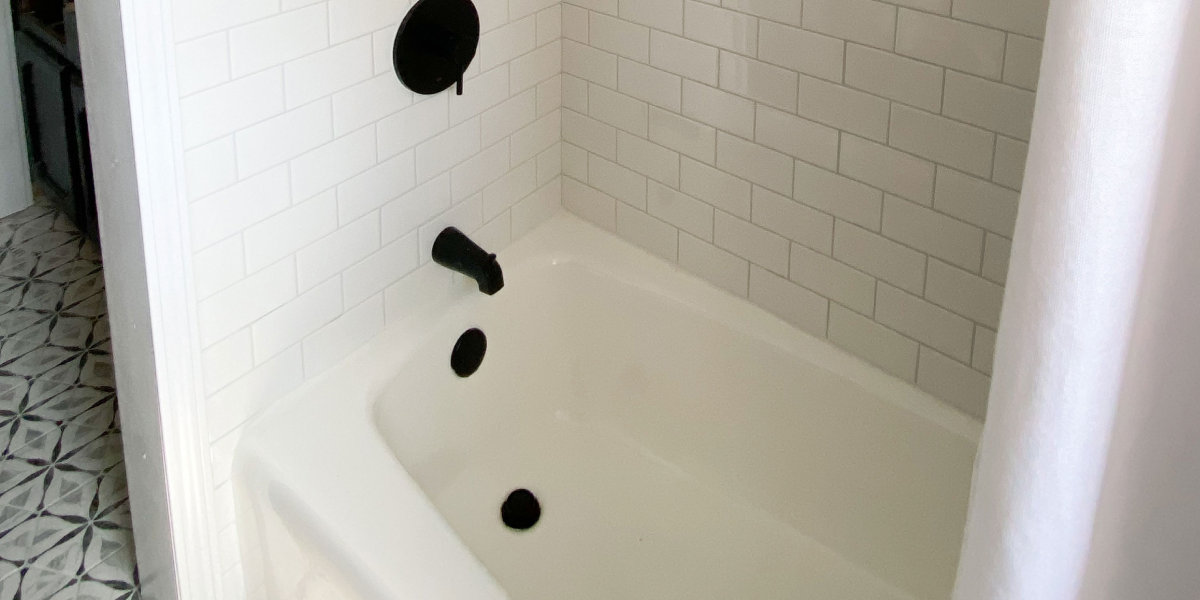
Step 10: Enjoy Your Refinished Bathtub
After completing all the steps, your bathtub should look glossy, clean, and fresh. With proper care, the new finish can last for many years. Clean it regularly with mild cleaners, avoid abrasive scrubbing tools, and always rinse and dry it after use. Following these simple maintenance habits will help preserve the shine and extend the life of your refinished bathtub.
Cost of Refinishing vs. Replacement
Here’s a quick comparison of costs:
| Option | Average Cost |
| DIY refinishing kit | $50 – $150 |
| Professional refinishing | $300 – $600 |
| Bathtub replacement | $1,000 – $3,000+ |
DIY vs. Professional Refinishing
Both DIY and professional refinishing have pros and cons.
DIY Refinishing
- Pros: Cheaper, satisfying to do yourself, good for small repairs.
- Cons: Takes time, needs skill, may not last as long.
Professional Refinishing
- Pros: Smooth and durable finish, lasts longer, less stress.
- Cons: More expensive, requires scheduling.
If you want long-lasting results, professionals are the best choice.
Maintenance Tips After Refinishing
Taking care of your refinished bathtub is very important. Good care will make the finish last longer and keep the tub looking shiny.
Clean the tub gently with a soft sponge or cloth. Avoid using harsh scrubbers or steel wool, as they can damage the new surface. Use mild soap or non-abrasive cleaners to keep it fresh and clean.
Do not leave bath mats with suction cups on the tub. They can pull on the finish and cause peeling. Instead, use a mat without suction or remove it after each bath.
Avoid dropping heavy objects on the tub. Small chips can grow into big cracks over time. Be careful with metal items like razors or shampoo bottles.
Keep the tub dry after use by wiping it down. This prevents water stains and soap buildup. With these simple steps, your refinished bathtub will stay beautiful for many years.
Common Mistakes to Avoid
Many people make small mistakes that damage a refinished bathtub. One common mistake is using strong cleaners. Harsh chemicals and bleach can weaken the new finish. Always use mild cleaners instead.
Another mistake is scrubbing with hard brushes or steel wool. These tools scratch the surface and make the tub look old again. Use a soft cloth or sponge for cleaning.
Some people place suction-cup mats on the tub. These mats pull at the coating and can cause peeling. Choose non-suction mats or remove them after bathing.
Leaving water, shampoo, or soap on the tub for a long time is another mistake. This creates stains and shortens the life of the finish. Wipe the tub dry after each use.
Avoid dropping heavy objects into the tub. Even small chips can spread and ruin the surface. Handle bath items with care to keep your refinished tub looking new.
Alternatives to Refinishing
Refinishing is not the only way to give your bathtub a fresh look. One option is using a bathtub liner. A liner is a custom-fit cover that goes over your old tub, making it look new without replacing it.
Another option is bathtub painting. Special epoxy paints can be applied to change the color or refresh the surface. This is cheaper than full refinishing but may not last as long.
Finally, replacing the bathtub is an option if the tub is very old, cracked, or damaged. A new bathtub gives a completely fresh look and lasts many years, but it is more expensive and takes longer to install.
By knowing these alternatives, you can choose the best solution based on your budget, time, and bathtub condition.
Pros and Cons of Refinishing
| Pros | Cons |
| Affordable | Can chip if not cared for |
| Quick process | DIY finish may look uneven |
| Eco-friendly | Not suitable for tubs with major damage |
| Fresh look | May need redoing after 7–10 years |
FAQs About Bathtub Refinishing
Q1. How long does a refinished bathtub last?
A refinished bathtub lasts 7–10 years with proper care.
Q2. Can I change the color of my bathtub when refinishing?
Yes, you can choose white, almond, or custom colors.
Q3. Is bathtub refinishing safe?
Yes, but wear protective gear and ensure good ventilation.
Q4. How soon can I use my tub after refinishing?
Wait at least 24–48 hours before using the tub.
Q5. Can I refinish a fiberglass bathtub?
Yes, fiberglass tubs can also be refinished.
Q6. How often should I refinish a bathtub?
Usually once every 7–10 years, depending on use.
Q7. Will refinishing remove all stains?
Yes, refinishing covers stains and makes the surface smooth.
Q8. Is DIY refinishing worth it?
Yes, if you want to save money and don’t mind some effort.
Final Thoughts
Now you know how to refinish a bathtub in a simple and clear way. This method saves money, time, and effort compared to replacing the tub. Whether you choose DIY or professional service, refinishing gives your bathroom a fresh and modern look.
With the right tools and care, your bathtub can shine like new again. Follow the steps, avoid mistakes, and maintain it properly for long-lasting results.